Tutorial: How to Mount an ISO File Using WinCDEmu
An ISO image is simply a "virtual copy" of an optical CD/DVD disc. Lots of software is distributed in the form of ISO images (e.g. you can download Windows 7 Service Pack ISO from Microsoft website). To mount an ISO file means to access its contents as if it was recorded on a physical medium and then inserted in the optical drive. If you downloaded a software in the form of an ISO image and want to install it, mounting it will be faster and easier than recording it on an actual disc.
To mount an image you need to install WinCDEmu. Then follow these steps:
-
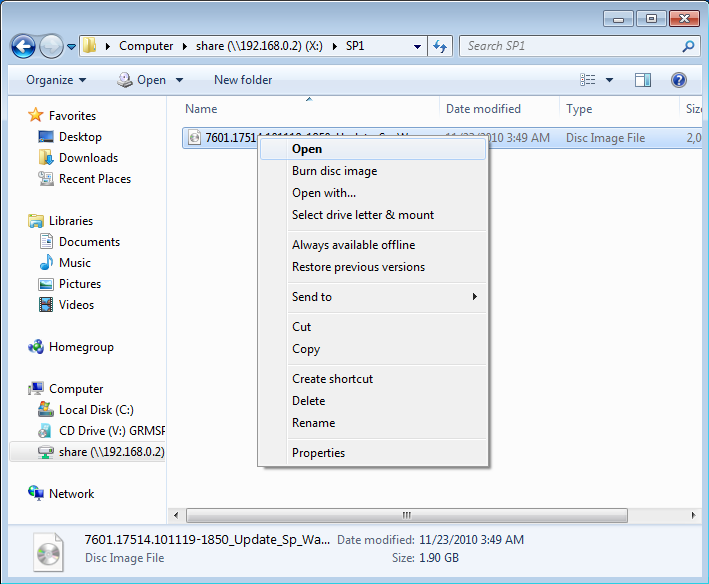
Open the folder containing the image file:
-
Double-click at the image. Alternatively, you can right-click and select
"Select drive letter & mount" from the context menu.
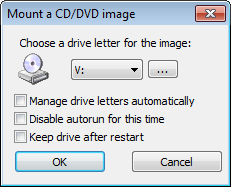
- Click at the OK button or press enter. If you don't want to see this dialog every time you mount an image, set the "Manage drive letters automatically" checkbox.
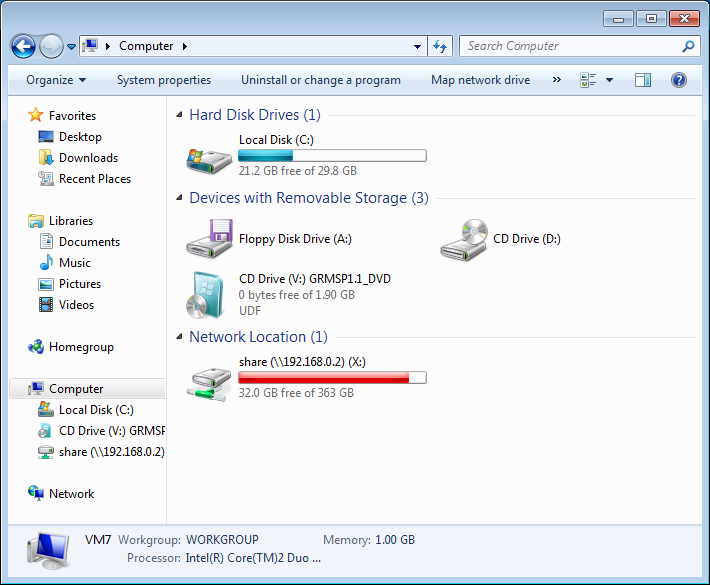
- A new virtual drive will appear among all other drives in the "computer"
folder:
- You can use the virtual drive the same way as you would use a "real" optical disc - browse its contents, open files, start programs.
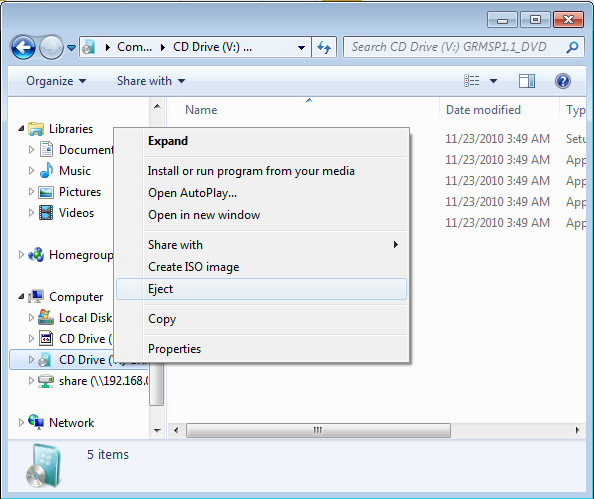
- Once you are done with the image, right-click on the virtual drive and
select "Eject":
- You can alternatively unmount the image by double-clicking at the image file again.
Read other WinCDEmu tutorials to learn how to create images with WinCDEmu and edit various settings.
If you have any questions or problems, feel free to post on WinCDEmu forum.